Dazzling Embroidery with Metallic Threads
Dazzling Embroidery with Metallic Threads

Dazzling Embroidery with Metallic Threads
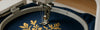
Embroidery enthusiasts, get ready to make your designs truly shine! Metallic threads add a touch of glamour to your creations. To ensure your embroidery machine handles them like a pro without any hiccups, let's dive into some expert techniques.
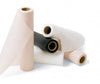
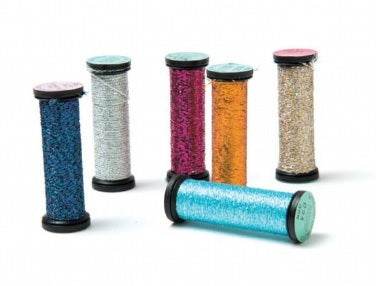
- Opt for Quality Spools: When selecting metallic thread, look for spools or cones wound uniformly. This ensures your thread hasn't suffered any damage and maintains consistent tension throughout your project.
- Needle Care: Metallic threads can be a bit demanding on needles. Always start with a fresh needle for each new project and replace it after every four hours of embroidery to ensure smooth stitching.
- Choose the Right Needle: A 90/14 metallic needle is your best bet for most metallic threads. Its larger size helps it penetrate fabric effectively, while features like a special scarf prevent skipped stitches and a widened groove reduce the risk of thread breakage.
- Go for Gold: Consider using gold embroidery needles coated with titanium nitride when tackling designs with high stitch counts. These needles have a rounded point for easy fabric penetration and an enlarged eye to accommodate metallic threads.
- Proper Spool Placement: If your metallic thread spool is wound in a straight pattern, place it vertically on your embroidery machine. This allows the spool to rotate smoothly as the thread unwinds, preventing spirals and twists.
- Adjust Tension: Most machines need tension adjustments when working with metallic thread. Lowering the top tension not only defines your stitches but also prevents the bobbin thread from peeking through.
- Chill the Thread: Before you start sewing with metallic thread, give it a couple of hours in the freezer. This helps prevent breakage and ensures smooth stitching.
- Be Cautious with Adhesives: Only resort to stabilizers with adhesive backing or spray adhesives when absolutely necessary. They can sometimes lead to buildups in the needle's eye, causing friction and breakage.
- Don't Over-Stabilize: Excessive stabilization can create more friction on the needle, resulting in thread breaks and stiff embroidery. Use it judiciously.
- Mind Your Stitch Length: Short, compact stitches can lead to thread breakage and tension issues. Consider enlarging your design or slowing down your machine for smoother stitching.
- Watch Stitch Length for Large Designs: On the flip side, long stitches can increase tension due to the machine's dramatic movement. Try reducing your design size or slowing down your machine in this case.
- Avoid Excessive Layers: Too many thread layers can make your fabric dense and cause metallic threads to break. Focus on areas with fewer thread layers for the best results.
- Font Size Matters: If using metallic thread for lettering, aim for a size no smaller than ¼ inch. Small lettering with compact stitches can lead to thread breaks.
- Preserve the Beauty: Projects adorned with metallic threads require special care. Ensure your dry cleaner uses standard petroleum benzene, perchloroethylene, or trichloroethylene chemicals to protect the threads.
- Handle with Care: Hot water and ironing can dull the luster of metallic threads. When laundering, use warm water with a gentle detergent to keep your thread colors vibrant.
Let's create stunning metallic thread embroidery together at fineryembroidery.com!